To use a pneumatic nail gun, first, ensure that the safety mechanism is engaged and the gun is connected to an air compressor. Next, insert the nails into the gun’s magazine and adjust the depth settings according to your project.
Then, aim the gun at the desired surface and firmly press the trigger to release the nail. Finally, repeat the process for each nail, making sure to maintain proper safety precautions throughout. Are you planning a woodworking project or working on a construction site?
A pneumatic nail gun can be an invaluable tool in speeding up your work and ensuring precise nail placement. Whether you are a DIY enthusiast or a professional carpenter, knowing how to properly use a pneumatic nail gun is essential to your success. In this guide, we will provide you with a step-by-step explanation on how to effectively use this powerful tool, ensuring a safe and efficient experience. So, let’s dive in and discover the key steps to mastering the pneumatic nail gun.
Versatility And Efficiency
A pneumatic nail gun is a versatile and efficient tool that can be used for various construction and woodworking projects. It provides fast and accurate results, allowing users to complete their tasks quickly and with precision. The pneumatic power allows for consistent and powerful driving force, ensuring that the nails are securely fastened.
One of the key advantages of a pneumatic nail gun is its ability to reduce user fatigue. Unlike traditional hammering, which requires physical strength and repetitive motions, a nail gun does the work for you. This not only reduces strain on your muscles and joints but also increases overall productivity. Whether you are a professional contractor or a DIY enthusiast, a pneumatic nail gun can greatly improve your efficiency and make your projects more enjoyable.
Key Components Of A Pneumatic Nail Gun
A pneumatic nail gun is a powerful tool that makes nailing tasks quicker and more efficient. Understanding the different parts and their functions is essential for using it effectively. Let’s take a closer look at the key components:
| Component | Function |
|---|---|
| Air Compressor | Supplies compressed air to power the nail gun |
| Air Hose | Transfers pressurized air from the compressor to the gun |
| Trigger | Activates the nail shooting mechanism |
| Magazine | Holds a strip of nails for continuous firing |
| Depth Adjustment | Controls how far the nail is driven into the material |
| Safety Guard | Prevents accidental firing and protects the user |
Using a pneumatic nail gun also requires adherence to safety precautions. Always wear safety glasses to protect your eyes from flying debris. Keep your fingers off the trigger when not in use and disconnect the air supply before cleaning or servicing the tool. Be mindful of your surroundings and make sure no one is in the path of the nails. Follow these guidelines to operate a pneumatic nail gun effectively and safely.
Step-by-step Guide On How To Use A Pneumatic Nail Gun
Preparing the work area and materials: Before using a pneumatic nail gun, it is important to prepare the work area and gather the necessary materials. Clear the area of any debris or obstacles that may hinder your work. Ensure that you have a sufficient supply of nails and a properly functioning air compressor.
Loading nails into the magazine: To load nails into the magazine of the nail gun, first, locate the magazine release lever and press it to open the magazine. Insert the nails, making sure they are aligned and facing the correct direction. Close the magazine securely by releasing the lever.
Adjusting the depth and angle of the nail gun: Most pneumatic nail guns have a depth control feature to adjust the depth at which the nails are driven into the material. Use the appropriate setting according to your requirements. Additionally, check if your nail gun allows adjustment of the angle at which the nails are fired.
Holding and positioning the nail gun correctly: Hold the nail gun firmly with both hands, ensuring a comfortable grip. Position it perpendicular to the surface you are nailing into. Maintain a stable stance to have better control and accuracy while using the nail gun.
Firing the nails with precision and control: Before pulling the trigger, position the nail gun at the desired location on the material. Gently press the nose of the nail gun against the surface and squeeze the trigger to fire the nail. Repeat the process for each nail, maintaining a consistent rhythm.
Clearing a jammed nail gun: If the nail gun becomes jammed, follow the manufacturer’s instructions for clearing the jam. Usually, this involves disconnecting the air supply, removing any remaining nails, and using a tool to remove the jammed nail or debris. Always ensure the nail gun is powered off and disconnected from the air compressor before attempting to clear a jam.
Tips And Techniques For Using A Pneumatic Nail Gun Safely
Wearing appropriate safety gear: When using a pneumatic nail gun, safety should be a top priority. Make sure to wear safety goggles, ear protection, and a dust mask to protect your eyes, ears, and lungs from debris and noise. Additionally, gloves can provide extra protection against splinters and sharp objects.
Maintaining a clean and organized work area: Before using a nail gun, it’s important to clean and organize your workspace. Remove any potential hazards, such as loose nails, electrical cords, or clutter. This will help prevent accidents and ensure smooth operation of the tool.
Proper handling and storage of the nail gun: Always carry the nail gun by the handle, keeping your finger off the trigger until ready to use. When not in use, store the nail gun in a safe and secure location, out of reach of children and away from any potential damage or tampering.
Regular inspection and cleaning of the nail gun: Regularly inspect your nail gun for any signs of wear or damage. Check the air hose for leaks, the trigger for smooth operation, and the nails for any defects. Clean the nail gun after each use, removing any debris or residue to keep it in optimal condition.
Following manufacturer’s instructions and guidelines: Lastly, it is crucial to always follow the manufacturer’s instructions and guidelines when using a pneumatic nail gun. This includes understanding the recommended operating pressure, nail size compatibility, and any specific maintenance or troubleshooting steps. By following these instructions, you can ensure both your safety and the longevity of the tool.
Troubleshooting Common Issues With A Pneumatic Nail Gun
Learn how to effectively troubleshoot and address common issues that may arise when using a pneumatic nail gun.
Nail gun not firing or misfiring: If your nail gun is not firing or misfiring, there are a few possible causes. Firstly, check if the air pressure is set correctly and if the trigger safety is engaged properly. Inspect the nails to ensure they are the correct size and properly loaded in the magazine. Additionally, make sure the nail gun is properly lubricated and there are no obstructions in the magazine or firing mechanism.
Nails not sinking properly: If the nails are not sinking properly into the surface, it could be due to incorrect air pressure or a worn-out driver blade. Check and adjust the air pressure according to the manufacturer’s guidelines. If the issue persists, it may be necessary to replace the driver blade.
Air leaks from the nail gun: Air leaks can occur due to worn-out seals or damaged connections. Inspect the seals and connections for any signs of damage and replace them if necessary. It is also important to check the air hose and fittings for any leaks or loose connections.
Nail gun jamming frequently: Nail gun jams can be caused by various factors, such as using the wrong type or size of nails, a dirty magazine, or a misaligned driver. Ensure that you are using the correct nails and keep the magazine clean and free from debris. If the driver is misaligned, refer to the manufacturer’s instructions to realign it properly.
Preventive measures for these common issues include regular maintenance, such as cleaning and lubricating the nail gun, as well as using high-quality nails and following the manufacturer’s guidelines for air pressure and nail size. It is also important to inspect the nail gun regularly for any signs of wear or damage and address them promptly.
Enhancing Your Skills With A Pneumatic Nail Gun
Enhance your skills with a pneumatic nail gun by learning how to use it effectively. Master the art of pneumatic nailing with this handy tool and complete your projects efficiently.
In order to enhance your skills with a pneumatic nail gun, it is important to practice on scrap materials before starting a project. This allows you to familiarize yourself with the tool and gain confidence in using it effectively. Additionally, mastering different nailing techniques and applications will greatly improve your overall performance. This can be achieved by trying out different types of nails, such as framing nails or finishing nails, and practicing on various surfaces. Learning how to adjust nail gun settings for different materials is also crucial in ensuring optimal results. Online resources and forums are great sources of information and can provide valuable tips and tricks to further expand your knowledge. By following these steps and continuously honing your skills, you will become proficient in using a pneumatic nail gun and achieve professional-quality results.| Practicing on scrap materials before starting a project |
| Mastering different nailing techniques and applications |
| Learning how to adjust nail gun settings for different materials |
| Expanding your knowledge through online resources and forums |
Maintaining And Caring For Your Pneumatic Nail Gun
Maintaining and Caring for Your Pneumatic Nail Gun:
Proper cleaning and lubrication are essential for the efficient functioning and longevity of your pneumatic nail gun. Regularly clean the nail gun by removing any debris or sawdust that can accumulate after each use. Use compressed air to blow out any residual dust from the air vents.
Ensure to lubricate the moving parts with high-quality pneumatic tool oil to reduce friction and wear. Pay extra attention to the trigger mechanism and the firing pin. Remember to follow the manufacturer’s instructions for the recommended type and frequency of lubrication.
Regularly inspect and maintain the air hoses and connections. Check for any leaks or damage and replace any worn-out or damaged parts immediately. This will prevent any loss of air pressure and ensure the consistent performance of your nail gun.
Storing the nail gun safely and securely is equally important. Keep it in a clean, dry place away from moisture and extreme temperatures. Use a dedicated storage case or a tool chest to protect it from accidental damage.

Credit: www.amazon.com
Frequently Asked Questions Of How To Use Pneumatic Nail Gun
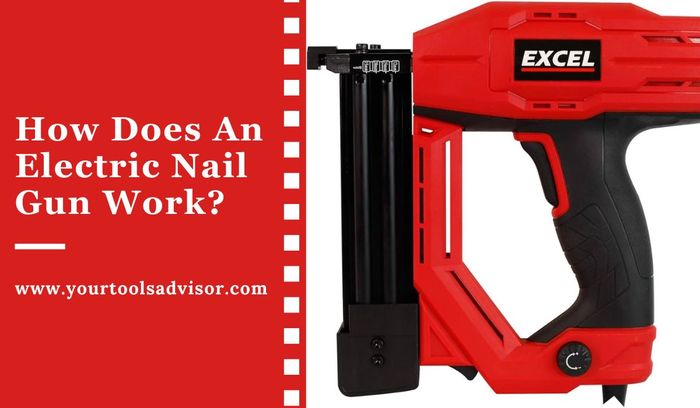
How Does A Pneumatic Nail Gun Work?
A pneumatic nail gun works by using compressed air to drive a piston that pushes the nail into the material. When the trigger is pulled, the compressed air is released, causing the piston to strike the nail and drive it into the surface.
What Are The Advantages Of Using A Pneumatic Nail Gun?
Using a pneumatic nail gun offers several advantages. It provides greater speed and efficiency compared to manual nailing, reduces fatigue and strain on the user, allows for precise placement of nails, and ensures consistent nail depth for a professional finish.
Is It Safe To Use A Pneumatic Nail Gun?
Yes, it is safe to use a pneumatic nail gun if proper safety precautions are followed. Always wear protective eyewear and gloves, secure the workpiece properly, keep your fingers away from the nail gun’s firing area, and disconnect the air supply when not in use.
Proper training and experience are also crucial for safe operation.
Conclusion
To wrap up, mastering the art of using a pneumatic nail gun can greatly enhance your DIY projects, saving you time and effort. By following the proper safety precautions, understanding the different types of nails, and practicing the correct techniques, you can ensure precise and efficient results.
Remember to maintain your nail gun regularly and seek professional guidance if needed. So, get ready to elevate your woodworking skills and make your projects a breeze with this powerful tool. Happy nailing!

Leave a Reply