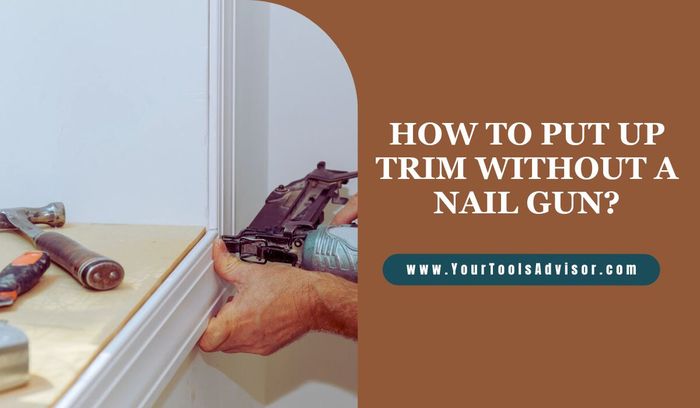
In the world of home improvement, adding trim is like the finishing touch of a masterpiece—it elevates the aesthetic appeal of any space, turning ordinary rooms into extraordinary showcases of craftsmanship.
However, not everyone has access to professional-grade tools like a nail gun, leaving DIY enthusiasts wondering how to achieve that polished look without the convenience of power tools.
If you find yourself in this situation, fear not! We are here to provide a precise answer to the question – “how to put up trim without a nail gun.”
Well, to put up trim without a nail gun, use adhesive caulk and finishing nails. Apply a thin layer of adhesive caulk to the back of the trim, press it against the desired surface, and secure it further with finishing nails.
This method is ideal for those who do not have access to a nail gun or prefer a nail-free installation. Placing trim enhances the aesthetic appeal of a room while also protecting the walls and door frames from damage.
Whether you’re completing a DIY project or making home improvements, knowing how to put up trim without a nail gun is a useful skill.
Let’s get to know this topic in detail…
Tools You Will Need
To put up trim without a nail gun, you’ll need a few essential tools for successful installation.
Firstly, a miter saw is crucial for cutting accurate angles and lengths. Besides, a coping saw comes in handy for intricate corners and complex shapes. Also, a tape measure and pencil are essential for precise measurements and marking.
Additionally, a stud finder will help you locate the wooden studs to secure the trim firmly. A caulk gun and adhesive provide a strong bond between the trim and the wall.
Finally, a hammer and finishing nails are useful for areas where a nail gun cannot be used. With these tools, you can achieve a professional-looking trim without relying on a nail gun.
Preparing The Trim
Preparing the trim for installation is essential to ensure a seamless and professional finish. Accurately measuring and cutting the trim pieces is the first step in this process. Take precise measurements using a measuring tape, making note of any corners or angles that may require additional cuts.
Once measurements are taken, use a miter saw or a coping saw to cut the trim at the appropriate angles. Take your time and double-check your measurements before making any cuts to avoid mistakes. It’s crucial to ensure that each piece of trim fits perfectly before moving on to the next step.
By carefully preparing the trim and taking the time to measure and cut accurately, you can achieve a polished look without the need for a nail gun.
How To Put Up Trim Without A Nail Gun?
Putting up trim without a nail gun can be accomplished with a few basic tools and a bit of patience.
Here’s a step-by-step guide to help you install trim using traditional methods:
Step 1: Measure and Cut the Trim
- Measure the walls where the trim will be installed.
- Use a miter saw or miter box to cut the trim at 45-degree angles for inside corners and straight cuts for outside corners. Ensure accurate measurements to achieve tight joints.
Step 2: Dry Fit the Trim
- Place the cut pieces in their intended positions without attaching them. This allows you to check the fit and make any necessary adjustments before permanently attaching the trim.
Step 3: Apply Wood Glue
- Apply wood glue to the back of the trim pieces. This helps create a strong bond between the trim and the wall.
Step 4: Position the Trim
- Carefully position the trim in place, aligning the mitered corners for a seamless look. Press the trim firmly against the wall to ensure good contact with the glue.
Step 5: Nail the Trim in Place
- Use a hammer and brad nails to secure the trim to the wall. Place nails at regular intervals, making sure they penetrate the trim and reach the wall for a secure hold. Be cautious not to overdrive the nails and avoid damaging the trim.
Step 6: Fill Nail Holes
- Once the trim is secured, use wood filler or putty to fill in the nail holes. Allow it to dry completely.
Step 7: Sand the Trim
- Sand the trim lightly to smooth out any rough spots, imperfections, or excess wood filler. This step prepares the trim for painting or finishing.
Step 8: Paint or Finish the Trim
- Apply paint or finish to match the trim with the surrounding surfaces. Allow it to dry completely before considering additional coats.
Additional Tips to Follow
- If the trim doesn’t sit flush against the wall, use a block and a hammer to gently tap it into place.
- Use a level to ensure the trim is straight and aligned correctly.
- If you don’t have a miter saw, a miter box and hand saw can be used for cutting angles.
- Consider pre-primed trim for easier painting.
By following these steps, you can successfully put up trim without the need for a nail gun.
FAQs About How To Put Up Trim Without A Nail Gun
Can you install trim without a nail gun?
Certainly! You can absolutely install trim without a nail gun. Traditional methods include using a hammer and finishing nails, ensuring proper alignment and spacing. Alternatively, adhesive products designed for trim installation provide a secure and nail-free option. With attention to detail and patience, achieving a polished trim without a nail gun is completely feasible.
What can you use instead of a nail gun for installing trim?
Certainly! Instead of a nail gun for installing trim, you can opt for traditional tools like a hammer and finishing nails. These tools offer precision and control, allowing you to carefully secure trim without the need for power tools.
Additionally, a brad nailer or a pin nailer can be effective alternatives, providing a streamlined and efficient way to attach trim without the noise and power requirements of a nail gun.
Can you glue trim instead of nailing?
Absolutely! Gluing trim instead of nailing is a viable and effective option. Using a strong adhesive designed for woodworking ensures a secure bond, eliminating the need for visible nails and reducing the risk of splitting the trim. This method not only provides a cleaner finish but also simplifies the installation process, making it a convenient alternative to traditional nailing.
How do you drive finish nails without a gun?
To drive finish nails without a gun, start by positioning the nail at a 45-degree angle to the surface. Use a hammer to gently tap the nail’s tip to create a starting point. Once the nail is partially embedded, adjust its angle to perpendicular and continue hammering until it’s flush with the material. Repeat the process for each nail, ensuring a smooth and polished finish.
Conclusion
Putting up trim without a nail gun is entirely possible with a few alternative techniques. By using adhesive, staples, or screws, you can secure the trim and achieve a professional-looking finish. Remember to measure and cut accurately, pre-drill holes for screws, and apply adhesive evenly to ensure a strong and secure hold.
Additionally, using a miter saw or coping saw can help you achieve seamless corners and a polished look. Take your time and don’t rush the process, as precision and attention to detail are key. With these tips, you can confidently tackle your trim project without the need for a nail gun.
By exploring alternative methods, you’ll save time, money, and expand your diy skillset. Happy trimming!

Leave a Reply