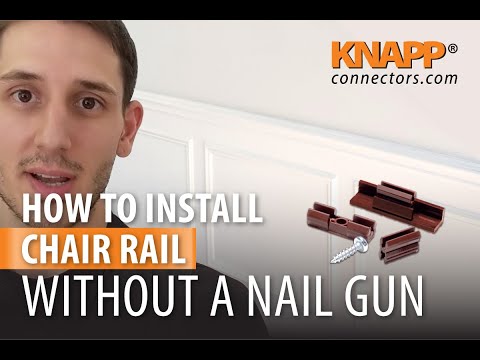
To install a chair rail without a nail gun, you can use adhesive caulk and finishing nails as an alternative method. Place the chair rail in the desired position, apply adhesive caulk to the backside, then press it against the wall.
Secure the chair rail further by using finishing nails at regular intervals to ensure it stays in place securely without the need for a nail gun. This method provides a simple and effective solution for installing a chair rail without the use of specialized tools.
Choosing The Right Tools And Materials
When installing a chair rail without a nail gun, it is important to have the essential tools at hand. These include a measuring tape to accurately measure the length of the chair rail, a combination square for marking precise angles, and a miter saw to make clean and accurate cuts.
Selecting the appropriate chair rail material is also crucial for a successful installation. Common chair rail materials include wood, MDF, and vinyl. Choosing a material that matches the style and design of your space is important. Wood offers a classic look, while MDF is more affordable and easier to work with. Vinyl chair rails are moisture-resistant and suitable for areas prone to splashing, such as bathrooms or kitchens.
Remember to measure and mark the height of the chair rail before installation to ensure a level and visually pleasing result. Additionally, using adhesive along with construction adhesive can provide extra support and stability.
Preparing The Walls
When installing chair rail without a nail gun, it is important to properly prepare the walls. This involves removing any existing chair rail and patching and sanding the wall surface. To remove the chair rail, use a pry bar or putty knife to gently pry it away from the wall. Take care not to damage the wall during this process. Once the chair rail is removed, inspect the wall surface for any holes or imperfections. Patch these areas using a spackling compound and a putty knife. Allow the compound to dry and then sand the patched areas until smooth. This will create a smooth and even surface for the chair rail installation. Remember to thoroughly clean the walls before proceeding with the installation.
Measuring And Marking
Determining the height and placement of chair rail is an important step in the installation process. To get accurate measurements, it is recommended to use a level. Start by identifying the desired height of the chair rail and mark it on the wall. Use a measuring tape to measure the distance from the floor to the marked height and make additional marks at regular intervals along the wall.
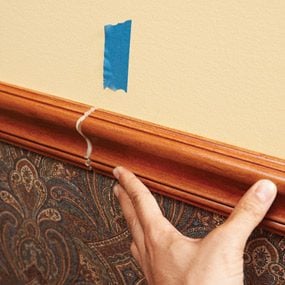
If you don’t have a nail gun, there are alternative methods to install chair rail. One common approach is to use adhesive along with finishing nails. Apply a bead of adhesive to the back of the chair rail and then press it firmly against the wall. Next, insert finishing nails into the pre-marked spots on the chair rail and hammer them in gently. Repeat this process for the entire length of the chair rail, making sure it is securely attached to the wall.
Installing The Chair Rail
In this blog post, we will discuss how to install a chair rail without a nail gun. When it comes to securing the chair rail, there are a few options available. One method is to use construction adhesive for a secure installation. Simply apply the adhesive to the back of the chair rail and press it firmly against the wall. This method eliminates the need for nails and provides a strong bond.
Alternatively, if you prefer a more traditional approach, you can secure the chair rail with finishing nails. Measure and mark the desired height of the chair rail on the wall, then use a level to ensure it is straight. Pre-drill holes for the nails and then hammer them in, making sure the chair rail is firmly attached.
If you want to avoid using nails altogether, there are alternative methods available. One option is to use adhesive strips designed for chair rail installations. These strips have a strong bond and provide a secure attachment without the need for nails. Another alternative is to use a combination of adhesive and screws, where the adhesive provides the initial bond and the screws add additional support.
Finishing And Touching Up
To achieve a professional and polished look when installing chair rail without a nail gun, it’s essential to pay attention to finishing and touching up. Once the chair rail is securely in place using alternative methods such as construction adhesive or a pneumatic finish nailer, fill any resulting nail holes and seams with a wood filler in a matching color. Allow the filler to dry completely before proceeding.
Next, sanding the chair rail is crucial to achieve a smooth finish. Use fine-grit sandpaper and gently sand the entire surface of the chair rail, paying attention to any imperfections. This will create a uniform and professional appearance, preparing the rail for painting or staining.
Finally, painting or staining the chair rail will bring the project to completion. Apply the chosen finish evenly, using smooth strokes and following the manufacturer’s instructions. Allow the finish to dry thoroughly before enjoying the newly installed chair rail.
Credit: www.familyhandyman.com
Tips And Tricks For A Professional-looking Installation
To install chair rail without a nail gun, there are several tips and tricks you can follow for a professional-looking installation.
Ensuring consistent spacing between chair rail sections: Before starting the installation, measure and mark the desired spacing between each section of the chair rail. Use a level to ensure the markings are straight.
Using a coping saw for seamless corners: When you reach a corner, cut the ends of the chair rail at a 45-degree angle using a miter saw. Then, use a coping saw to remove the excess material and create a seamless joint with the adjacent rail.
Properly aligning chair rail joints: To ensure a seamless appearance at the joints, use a miter saw to cut the chair rail at a 45-degree angle where it meets another piece. Apply a small amount of wood glue to the joint before securing it with finishing nails.
Maintenance And Care
The chair rail adds an elegant touch to any room, and with proper cleaning and maintenance, it can stay in excellent condition for years to come. To clean the chair rail, start by dusting the surface with a dry cloth or a soft-bristle brush. Make sure to remove any loose dirt or debris before proceeding. For tougher stains or dirt, mix mild soap with warm water and use a soft cloth or sponge to gently scrub the affected area. Avoid using harsh chemicals or abrasives as they may cause damage to the chair rail’s surface. In addition to regular cleaning, it’s important to check the condition of the chair rail periodically. Look for any signs of damage, such as cracks or chips, and address them promptly. For minor dents or scratches, you can use a touch-up paint or a wood filler to repair the surface. If the damage is more severe, it may be necessary to replace the damaged section of the chair rail. By staying proactive with maintenance and promptly addressing any issues, you can enjoy your chair rail for many years with minimal upkeep.
Faqs
Can I install chair rail without damaging the walls?
Yes, you can install chair rail without damaging the walls. One alternative to nails is using adhesive. There are specific adhesives available that are designed for chair rail installation. They provide a strong bond and eliminate the need for nails. Another alternative is using construction adhesive along with small finishing nails. The adhesive acts as the primary support, while the nails secure the chair rail in place.
What alternatives are there to nails for securing the chair rail?
Aside from adhesive, you can also use screws or brad nails to secure the chair rail. Screws can provide a strong hold, but they require pre-drilling holes. Brad nails, also known as finishing nails, are thin and leave small holes that are easy to patch up later.
How do I ensure the chair rail aligns properly with other architectural elements?
Before installing the chair rail, take measurements and mark the desired height on the wall using a level. Use a stud finder to locate and mark the studs. This will ensure that the chair rail is installed securely. Additionally, use a level and a chalk line to create a straight reference line for aligning the chair rail horizontally. Take your time to measure and align the chair rail accurately to ensure proper alignment with other architectural elements.
Frequently Asked Questions For How To Install Chair Rail Without A Nail Gun
How Can I Install Chair Rail Without Using A Nail Gun?
To install chair rail without a nail gun, you can use adhesive or construction adhesive tape for bonding. Apply the adhesive or tape to the back of the chair rail and press it against the wall. Use a level to ensure it is straight and secure it with masking tape until the adhesive dries.
What Tools Do I Need To Install Chair Rail Without A Nail Gun?
To install chair rail without a nail gun, you will need a measuring tape, a miter saw or a coping saw to cut the chair rail, a level to ensure it is straight, adhesive or construction adhesive tape for bonding, a putty knife for spreading the adhesive, and masking tape to hold the chair rail in place until the adhesive dries.
Can I Use Liquid Nails To Install Chair Rail Without A Nail Gun?
Yes, you can use Liquid Nails or any other construction adhesive to install chair rail without a nail gun. Apply the adhesive to the back of the chair rail and press it against the wall. Use a putty knife to spread the adhesive evenly, and then secure the chair rail in place with masking tape until the adhesive dries.
Conclusion
Installing chair rail without a nail gun is a manageable task that requires patience and the right tools. By following the step-by-step guide provided in this blog post, you can achieve professional-looking results without the need for expensive equipment. Remember to measure accurately, use the right adhesive, and take your time during the installation process.
With these tips, you’ll be able to add a touch of elegance to your home decor while saving time and money. Happy DIY-ing!

Leave a Reply