To build an electric palm nailer, you need to gather the necessary materials and tools and follow a step-by-step process. In this guide, we will outline the key components and steps involved in constructing your own electric palm nailer, providing you with a functional and efficient tool for your woodworking projects.
So, let’s dive into the details and get started on building your electric palm nailer!
Planning Your Electric Palm Nailer Project
Planning your electric palm nailer project begins with choosing the right materials and tools. This ensures that you have everything you need to complete your project efficiently and effectively. Start by selecting high-quality materials and the appropriate size of nails for your specific task. It’s also important to choose a reputable brand for your electric palm nailer, considering factors like durability, power, and user-friendliness.
Once you have gathered all the necessary materials and tools, determine your project timeline. This will help you organize your tasks and set realistic deadlines. Take into account any additional steps, such as prep work and clean-up, when creating your timeline.
Setting a budget is another crucial aspect of planning your electric palm nailer project. Consider the cost of materials, tools, and any additional supplies you may need. Research prices and compare options to ensure you are getting the best value for your money. Don’t forget to include any potential expenses for hiring professionals or renting equipment if necessary. By carefully planning your project, you can ensure a successful and stress-free experience with your electric palm nailer.

Credit: m.youtube.com
Gathering Materials And Tools
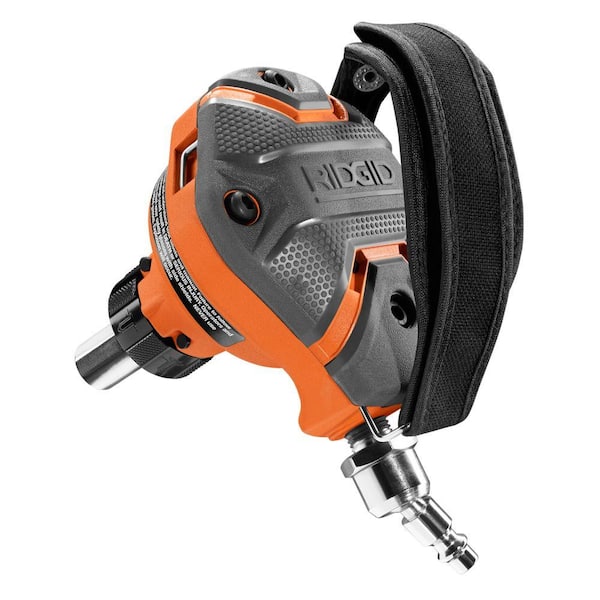
Gathering the necessary materials and tools is the first step in building an electric palm nailer. Before starting the project, it’s important to explore the different types of palm nailers available in the market. This will help you determine which type will best suit your needs. Once you have decided on the type of palm nailer you want, you need to understand the components needed for an electric version. This includes a power source, such as a battery or cord, as well as the nailer itself and any additional accessories that may be required. Finally, it’s crucial to research reputable suppliers to ensure you are purchasing quality materials and tools for your project. By following these steps, you can gather all the necessary items needed to successfully build your own electric palm nailer.
Assembling Your Electric Palm Nailer
Building an electric palm nailer is a straightforward process that can be done with a few simple steps. The first step is to install the motor and power source. This will provide the necessary energy for the nailer to function properly. Once the motor is securely in place, the next step is to secure the internal circuitry. This will ensure that the nailer operates safely and efficiently. By following these step-by-step instructions, you can easily assemble your electric palm nailer without any difficulties.
Testing And Troubleshooting
Testing and Troubleshooting
Performing a safety check is an essential step when building an electric palm nailer. Start by ensuring that all safety features, such as a trigger lock and safety glasses, are in place. Next, test the functionality of the palm nailer before use. Check the power source and make sure the battery is charged or the cord is properly connected.
To identify and resolve common issues, it is important to be familiar with the user manual provided by the manufacturer. If the palm nailer is not functioning properly, check for any loose connections or damage to the wiring. Clean the device regularly to prevent dust and debris from affecting its performance. In case of persistent issues, contact the manufacturer or a professional for further assistance.
Enhancing Your Electric Palm Nailer
Building an electric palm nailer is not just a simple task, but enhancing it with adjustable settings for speed and power can take it to the next level. By adding these adjustable settings, you can have more control over the nailer and ensure accurate results for different types of projects.
In addition to the adjustable settings, retrofitting additional features for versatility can make your electric palm nailer even more useful. Consider adding features such as a flip-out stand for stability or a pivoting nose for accessing tight spaces. These additional features can greatly enhance the functionality and convenience of your nailer.
Furthermore, exploring customization options opens up a world of possibilities. From custom grips and handles to specialized attachments, there are numerous ways to personalize your electric palm nailer to suit your specific needs and preferences. Customization allows you to make your nailer truly unique and tailor it to the tasks you commonly encounter.
Maintenance And Safety
Proper cleaning and maintenance procedures are essential for the longevity of your electric palm nailer. Regularly clean the tool after each use, removing debris and dust from the vents and crevices. Lubricate all moving parts with a lightweight, non-greasy oil to prevent rust and ensure smooth operation. Sharpen or replace the nails regularly to ensure optimal performance.
Tips for extending the lifespan of your palm nailer:
- Store the nailer in a dry, protected area when not in use, preferably in a case or bag to protect it from dust and potential damage.
- Inspect the power cord for any signs of wear and tear, and replace it if necessary.
- Do not exceed the recommended operating pressure to prevent strain on the motor and internal components.
- Follow the manufacturer’s instructions for any specific maintenance requirements.
- Always wear protective goggles or glasses to shield your eyes from flying debris.
- Use appropriate ear protection to prevent hearing damage from the noise of the palm nailer.
- Ensure a stable and secure work surface to avoid accidents or injuries.
- Keep your hands and fingers away from the nailer’s operating area to avoid accidental contact.
The Benefits Of Building Your Own Electric Palm Nailer
The benefits of building your own electric palm nailer are numerous. Firstly, you can experience significant cost savings compared to purchasing a pre-built one. By sourcing the required components and assembling them yourself, you can avoid the markup costs associated with buying a ready-made tool.
Additionally, building your own electric palm nailer allows for customization options to suit your specific needs. You can choose the materials and features that best align with your preferences and project requirements. This level of customization ensures that you have a tool that works perfectly for you.
Moreover, building your own electric palm nailer provides a sense of accomplishment and DIY satisfaction. It allows you to showcase your skills and creativity in tool creation. There’s a certain pride that comes with using a tool you built with your own hands.
Frequently Asked Questions Of How To Build An Electric Palm Nailer
What Is The Air Pressure For A Palm Nailer?
The air pressure for a palm nailer typically ranges between 60 and 120 PSI.
Is There A Cordless Palm Nailer?
Yes, there is a cordless palm nailer available. It offers convenience and portability for various nailing applications.
What Is The Biggest Difference Between A Pneumatic Framing Nailer And A Palm Nailer?
The biggest difference between a pneumatic framing nailer and a palm nailer is the way they are operated. While pneumatic framing nailers require an air compressor to power them, palm nailers are handheld and can be operated with just one hand.
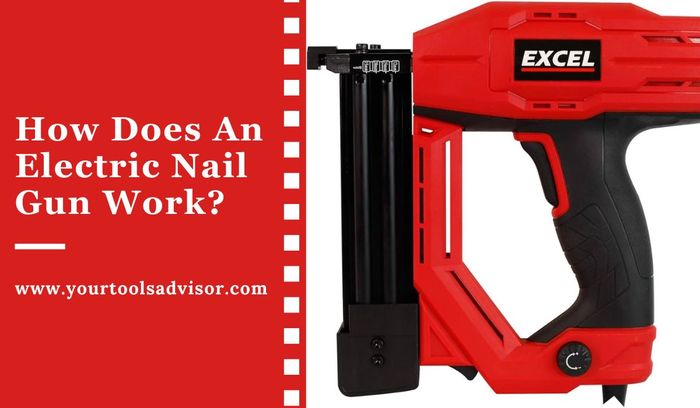
How Does An Electric Palm Nailer Work?
An electric palm nailer works by utilizing the power of electricity to drive nails into various surfaces. It features a compact design that fits comfortably in your palm, making it easy to maneuver and control. By pressing the nailer against the surface and pulling the trigger, the electric motor drives the nail with precision and efficiency.
Conclusion
To sum up, building an electric palm nailer can be a rewarding and cost-effective project for any DIY enthusiast. By following the step-by-step instructions provided in this blog post, you can create a powerful tool that will make your carpentry projects a breeze.
Remember to gather all necessary materials and take safety precautions while working. With a little time and effort, you’ll have a customized electric palm nailer that will serve you well in your woodworking endeavors. Happy building!

Leave a Reply